Overview

Platform support
Pandafold will be available for Windows(x86), Mac(arm and x86) and Linux(x86). We’ve purposefully been testing it on older slower laptops, so we’re optimistic that it will work with a computer with a 8gb of ram and an older processor.
UI Overview
The UI tries to follow patterns found in other popular editor software. There are multiple tabs (Model, Layout, Materials) which contain specific workspaces.
With left-to-right workflow pattern, as you progress with your project you move from the model view to the layout view.
Then there are tools, on the left, which contain tools for selecting items, creating seams, editing seams, cutting patterns, adjusting grain-lines, setting materials, moving models, etc.
On the right there is a object tree, which allows you to select specific objects and below that an object properties panel which allows for manipulating properties on specific objects.
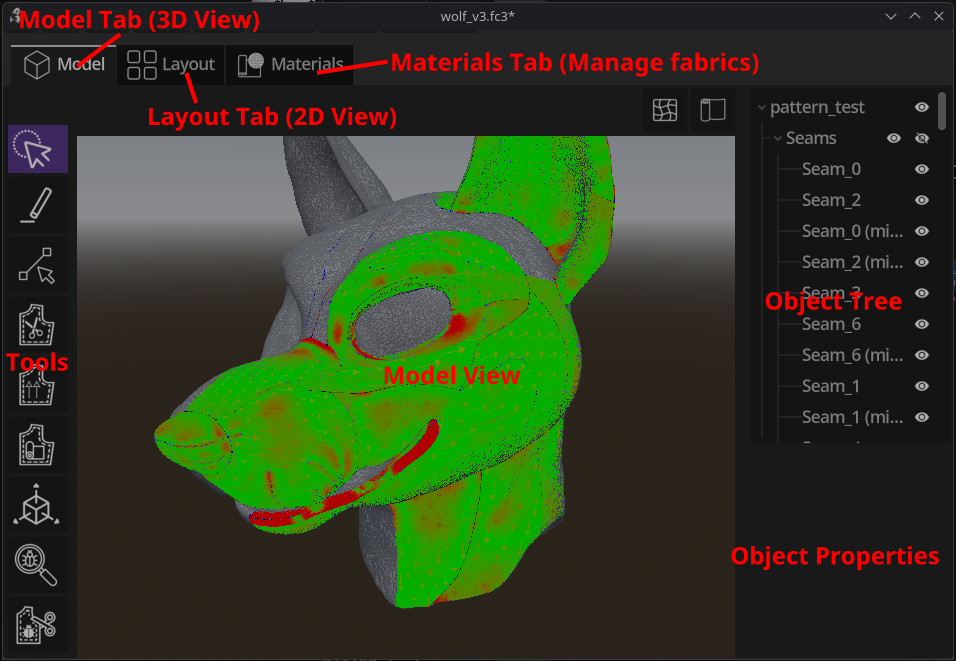
Model tab
The model tab is for manipulating 3D objects and is where you create seams, and cut patterns.
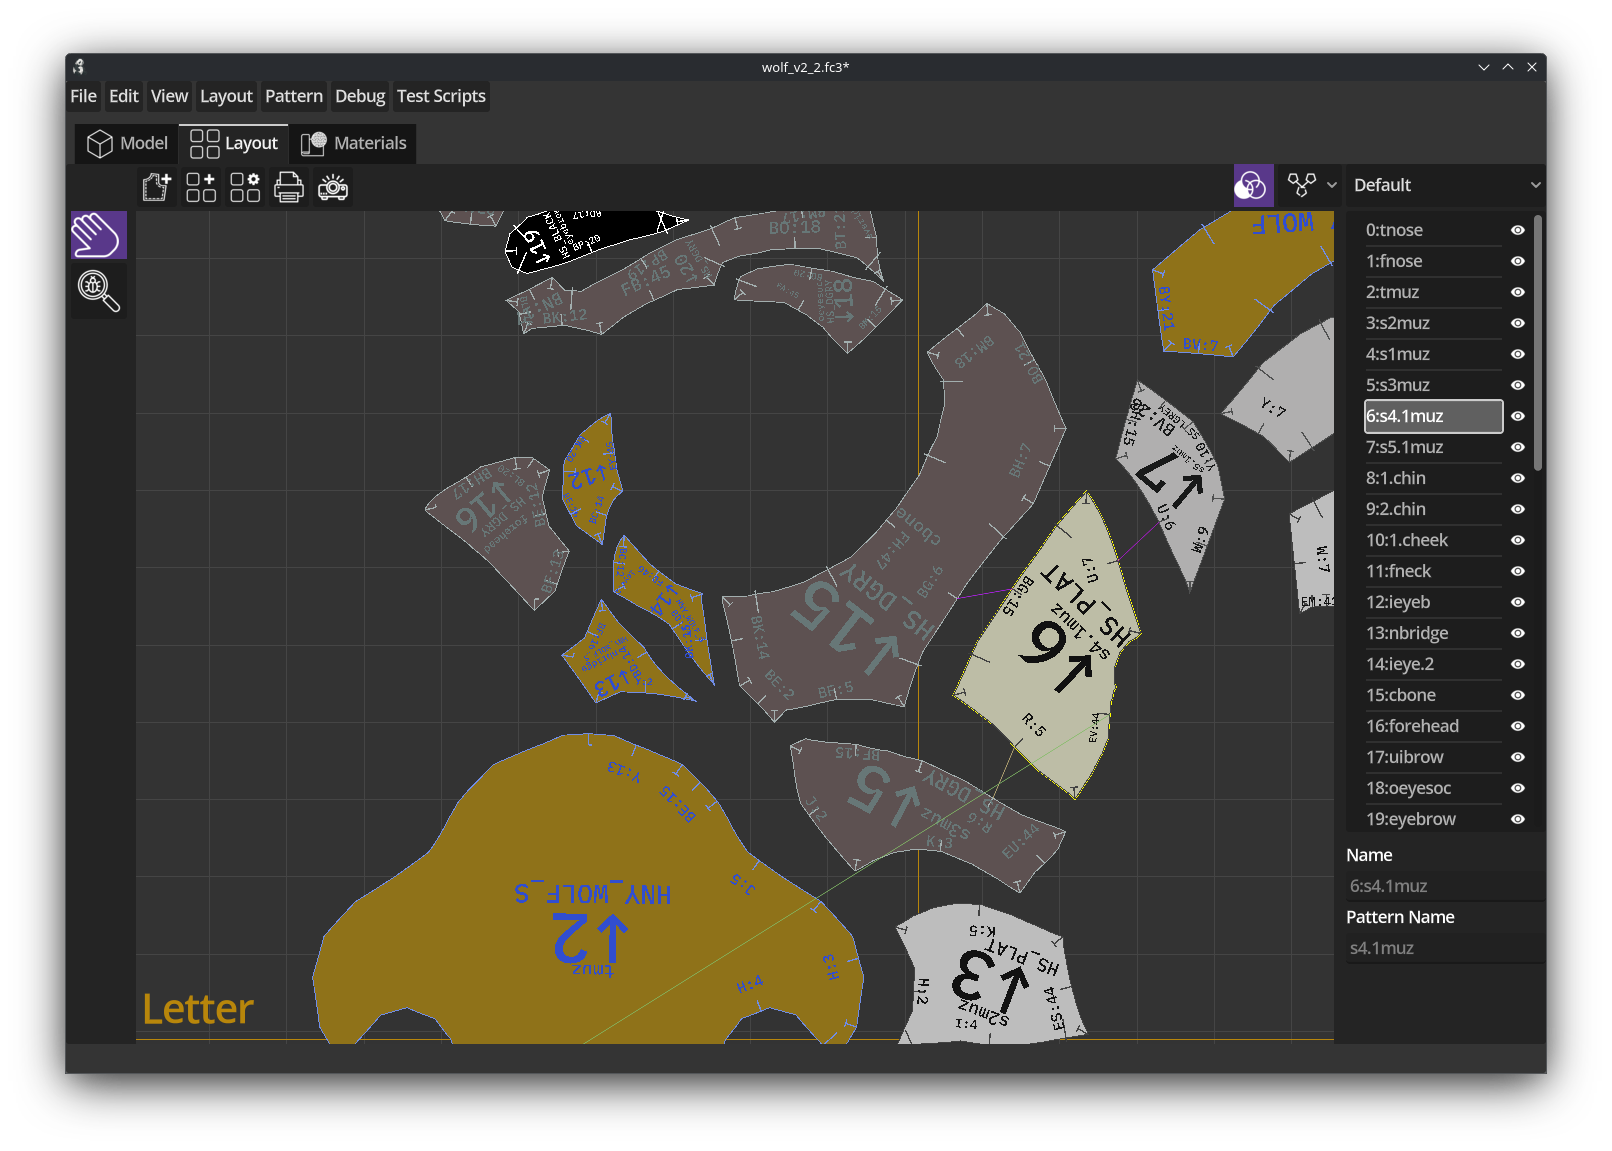
Layout tab
The layout tab is for manipulating the 2D patterns that have been cut and follows a similar layout style as the model tab, with tools on the left and an object tree on the right.
Multiple layouts can be defined for different use cases, so for example a layout per a material can be defined. Pandafold will also automatically add patterns to material specific layouts.
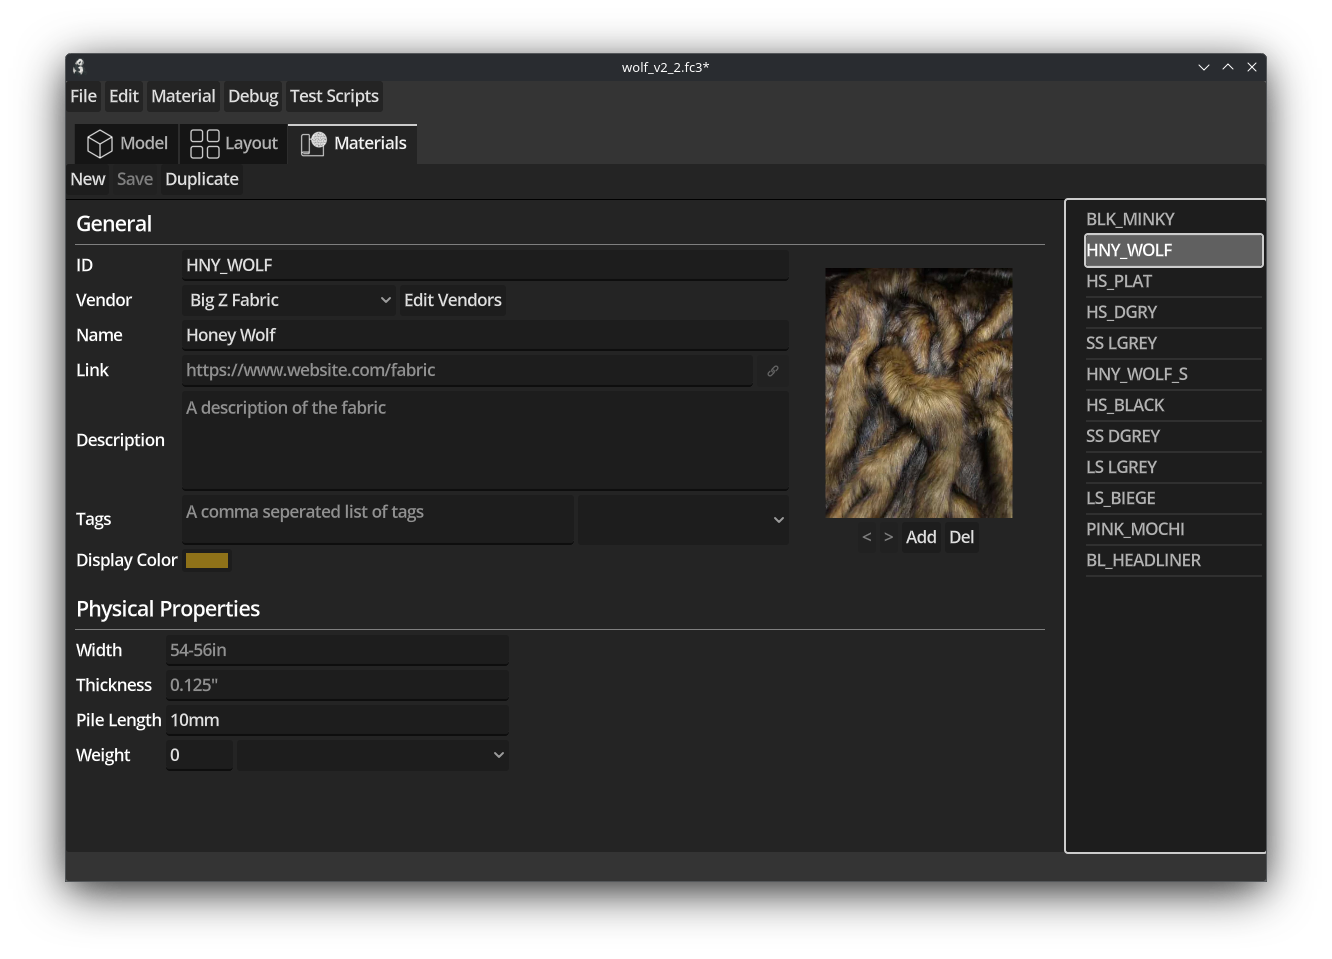
Materials tab
The materials tab is used to create and edit materials (fabrics). Materials that are defined here can be assigned to patterns. Pandafold uses the display color and some of the physical properties to decide how materials are displayed in both the model and layout tab.
The material data entered here will eventually be used to help create an assembly guide and is also a reference for a build guide.
Importing a mesh to pattern
To get started with patterning with pandafold we need to have some mesh we want to pattern, that mesh can come from blender, or Nomad sculpt, or 3DCoat or some other 3D editor, or any other source.
Meshes don’t have to be watertight.
At the moment pandafold only supports meshes in the .obj file format.
Typically it helps to have a mesh with fairly dense and good topology. But pandafold is specifically designed to work well with dense meshes which don’t have a good topology.
The mesh below is the one we typically use for testing, it’s both dense and has a bad topology.
We designed pandafold to work with meshes like this because we just want to pattern things, we don’t want retopologize our meshes as part of our workflow, we just want to make patterns and sew stuff!
If you want to retopologize your mesh, we’d recommend using Quad Remesher which can be used as a plugin to many popular 3D editors.
The reason to retopoligize might be because you want to use certain features of your mesh for patterning, but again it isn’t required to use pandafold.
Creating seams
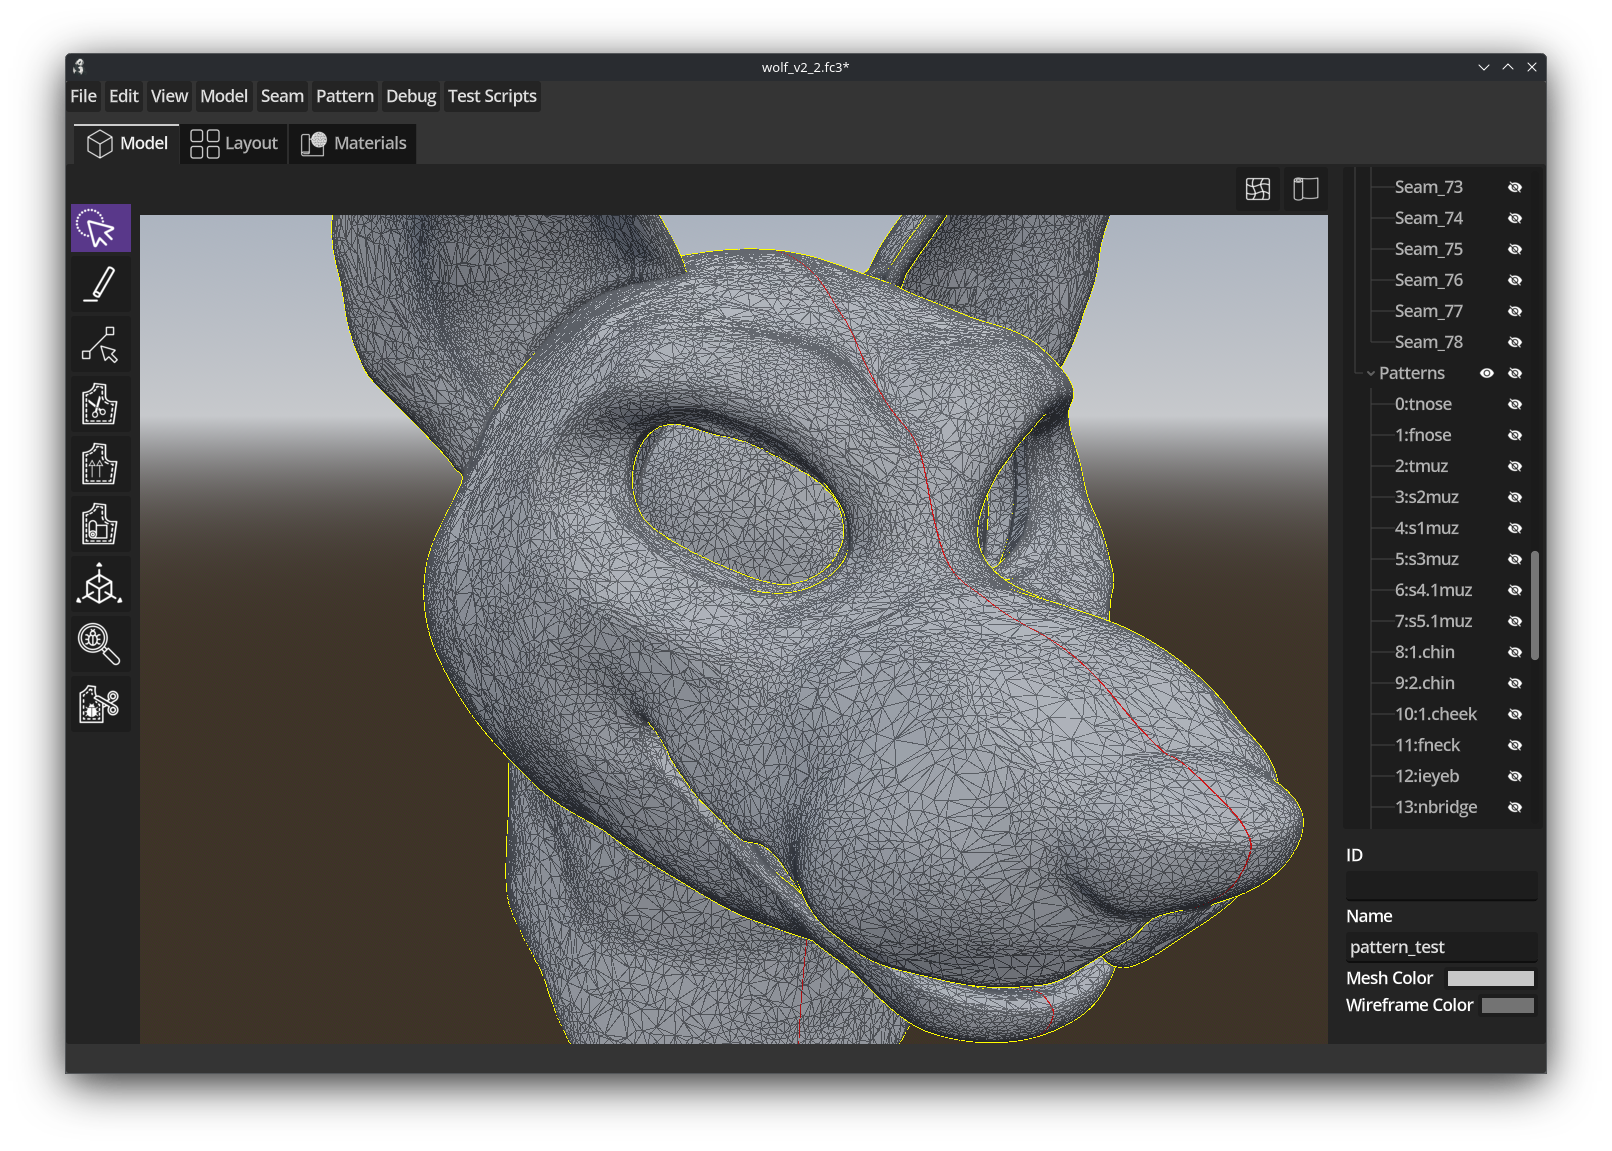
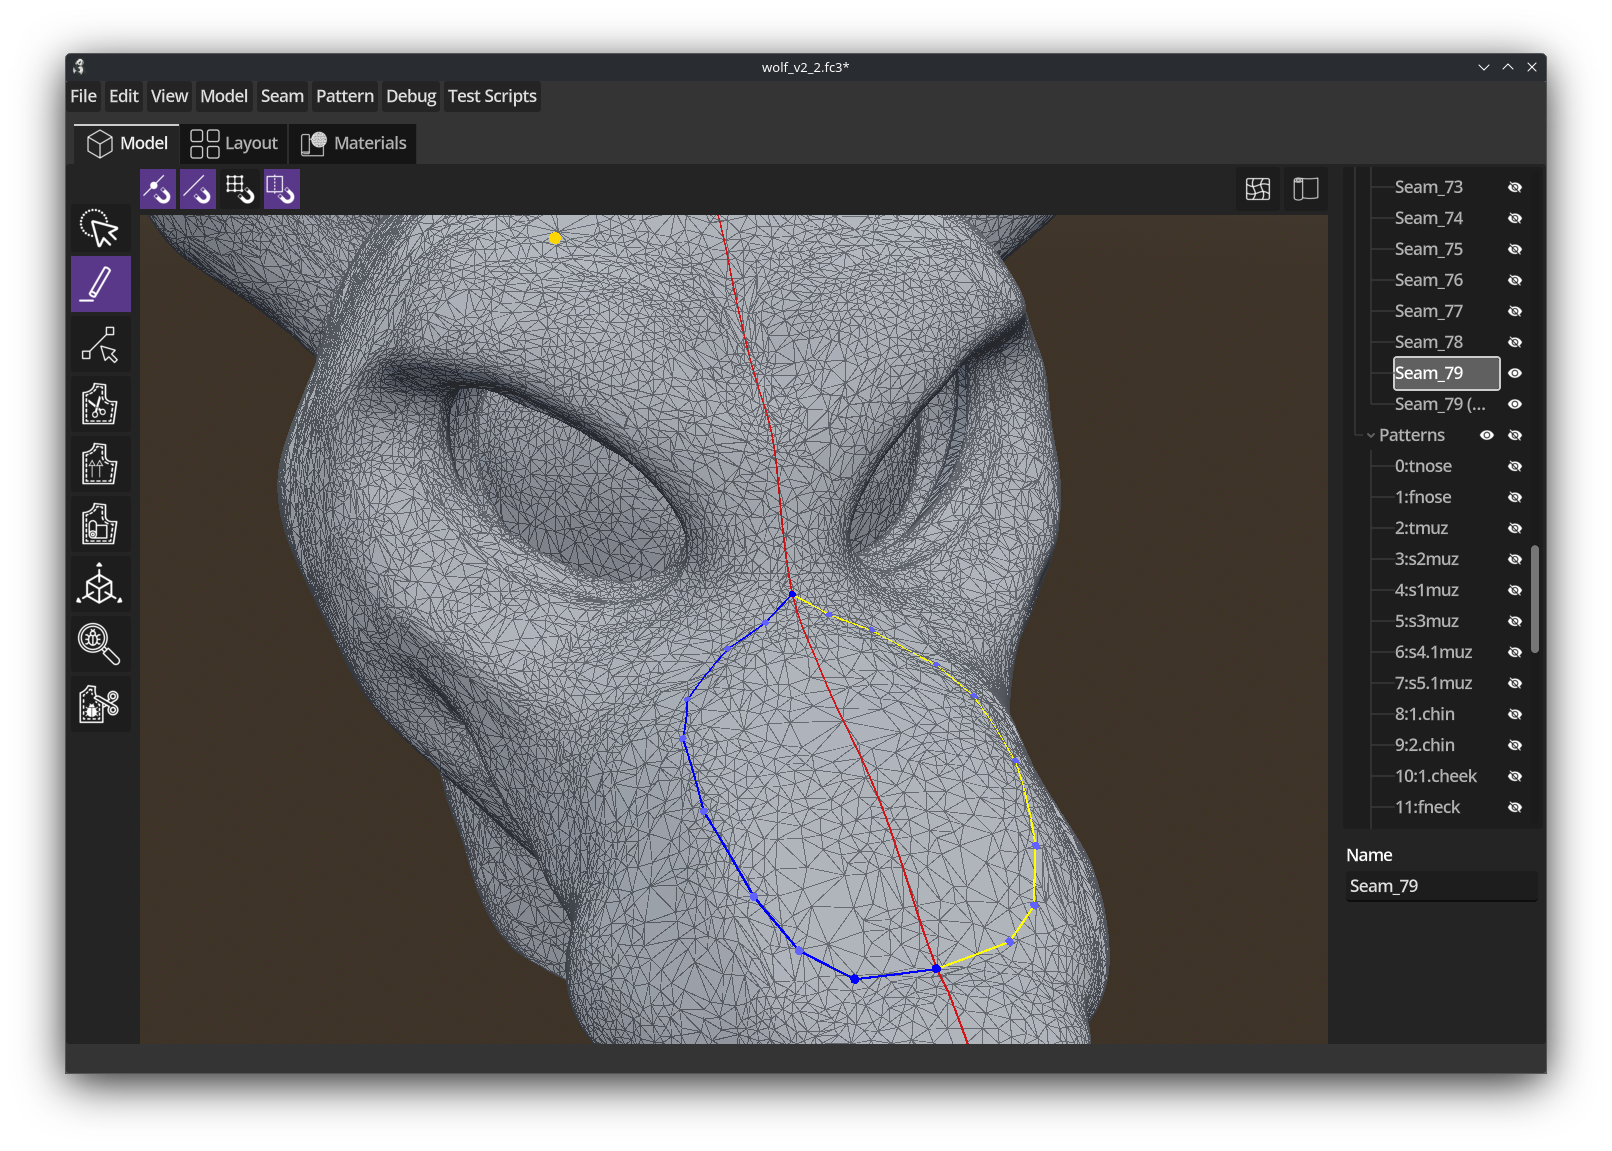
After you import your mesh you can add a snap-line, which is a line which can be used for snapping seams to. The snap-line will allow you to mirror seams and create symmetric patterns.
In the example below we’ve drawn a seam and then mirrored it creating a symmetric pattern (the yellow and blue lines).
With pandafold you aren’t constrained to drawing seams on the mesh topology, you can draw a seam anywhere you want.
When you draw a seam snapping the seam to something is particularly important the pattern cutting engine will find the smallest gap possible to traverse when it’s deciding what is part of a pattern.
So pandafold offers a number of seam snapping options, such as snap to seam, snap to seam vertex, snap to snap-line, snap to vertex (topology).
Editing seams
There is also a seam editor tool so you can modify the seams you’ve drawn.
Cut patterns
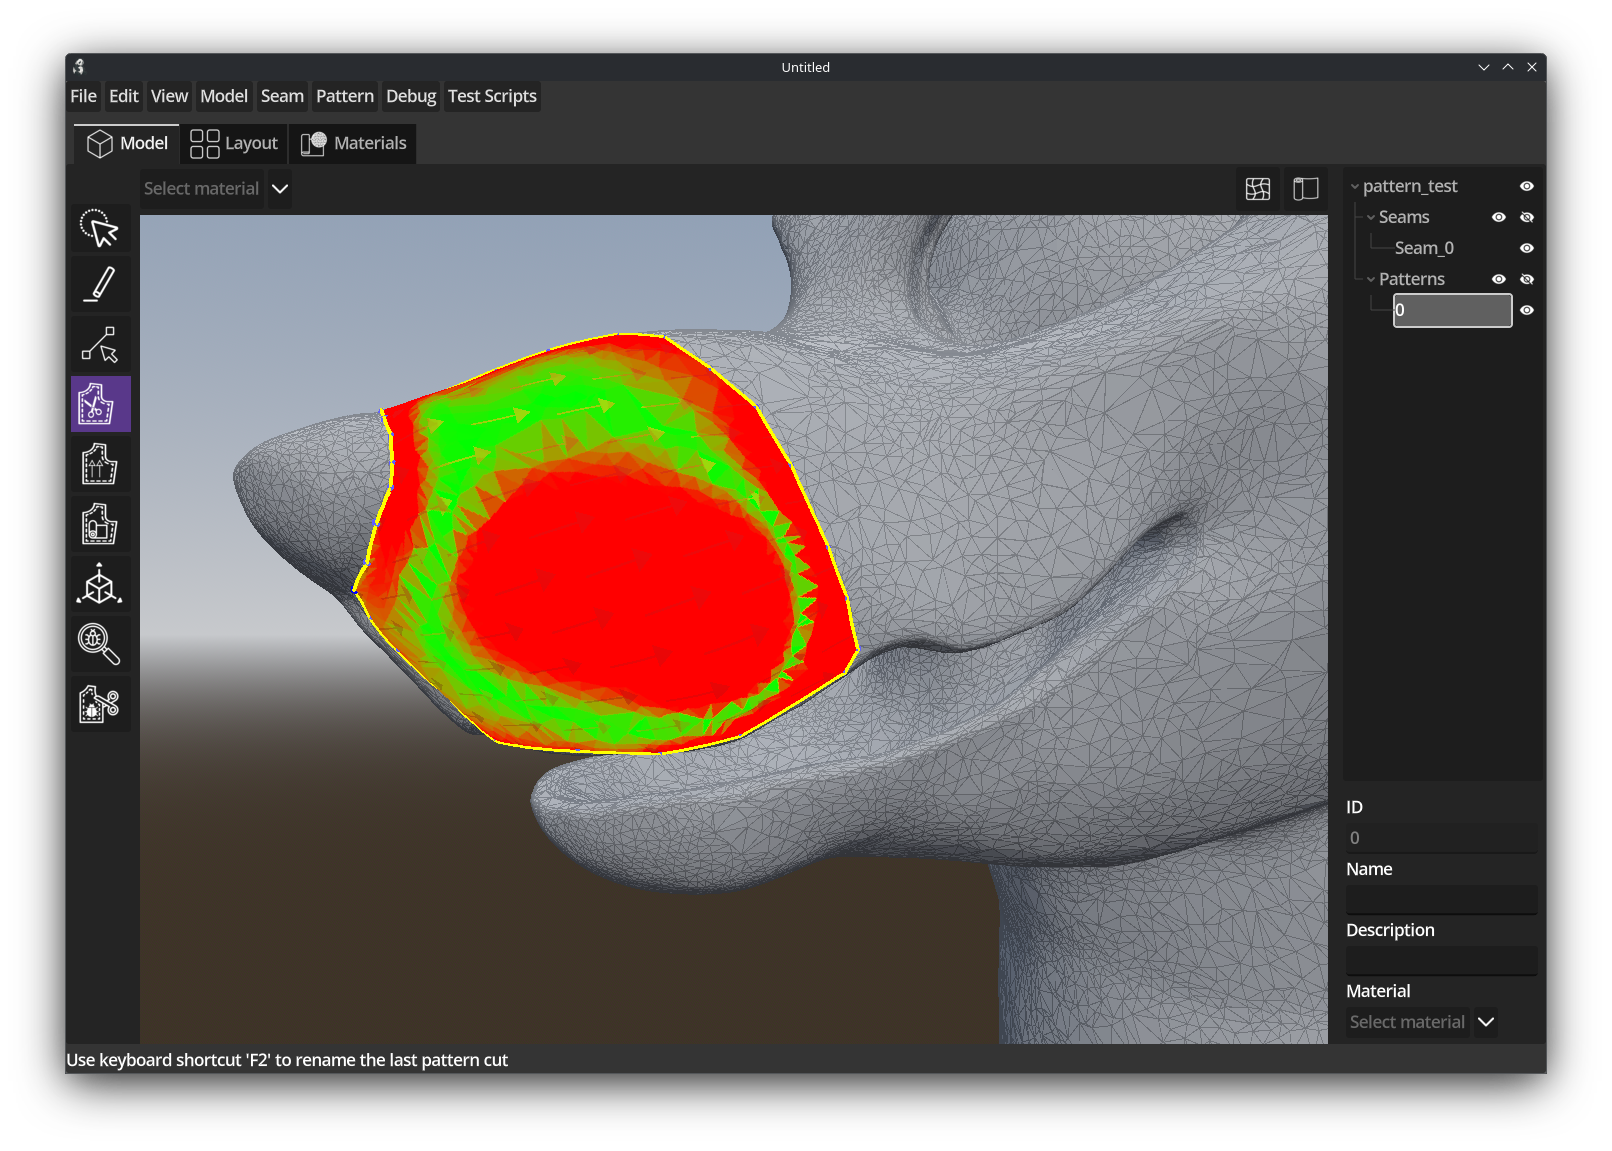
Once you have an area enclosed with a seam you can cut the pattern.
The pattern cutting tool both cuts the pattern and sets the grain line (fabric orientation) in a single action.
Once the pattern has been cut this will result in a distortion view of the pattern that has been cut. The areas in red have high distortion (> 5%) and will require the multiple patterns or a dart to be added.
The workflow here is hit Ctrl-Z or undo to remove the pattern and then add new seams and cut the pattern again.
Adjusting grain-lines
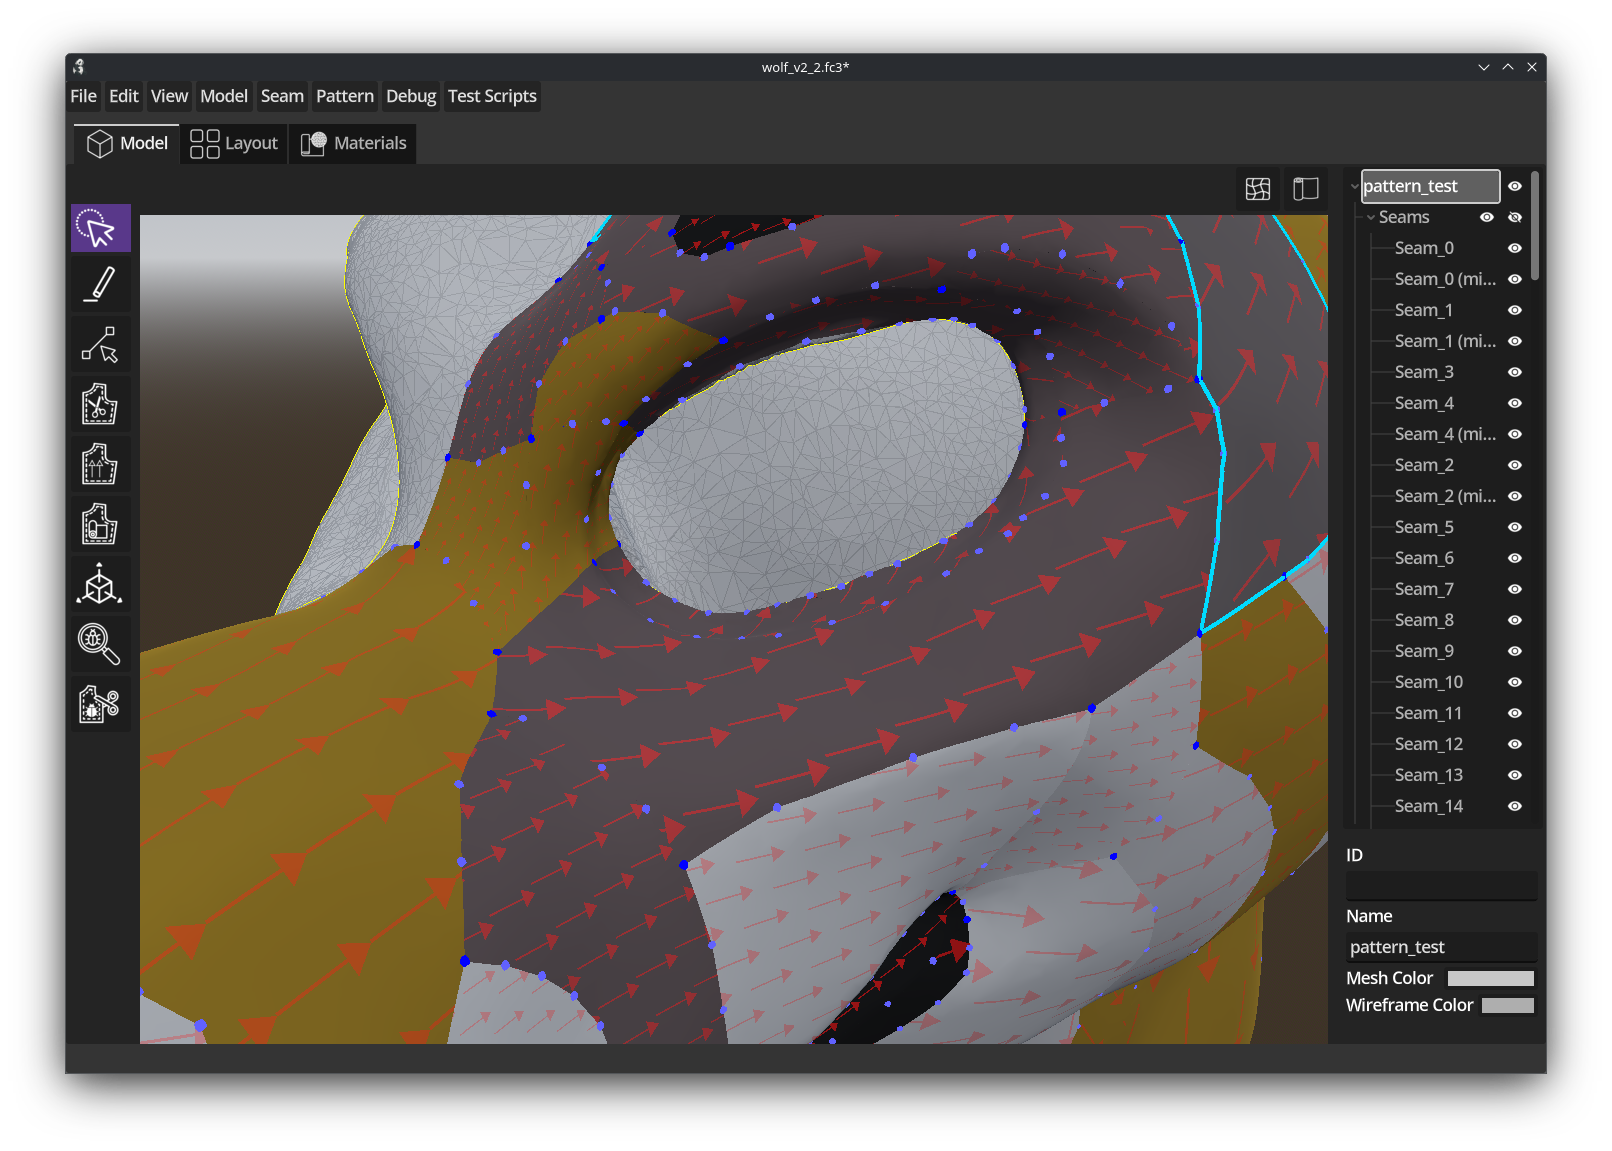
Grain-lines or fabric orientation dictate how the pattern should be laid out on the fabric. In the image below the red lines on the patterns show the grain-line.
Panadafold makes it easy to set the grain-line when you cut the pattern, but there is also a tool on the left for adjusting grain-lines after the pattern has been cut.
Grain-lines are carried over to the 2D patterns.
Layout View
Managing patterns
Once you’ve cut some patterns they show up in the layout view
From here you can move the patterns around and orient them, duplicate them, flip them, etc.
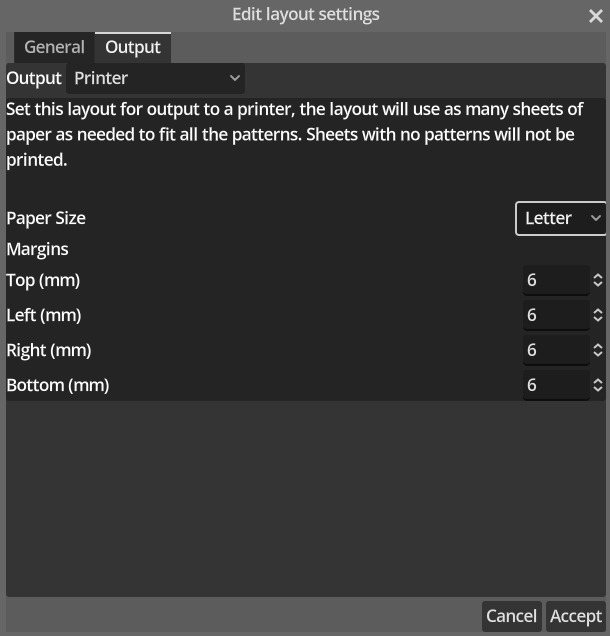
Each layout has a specific paper size, and you can adjust these per a layout.
Pattern labeling
Each pattern is assigned a unique ID, and all the seams associated with other patterns are indexed and labeled:
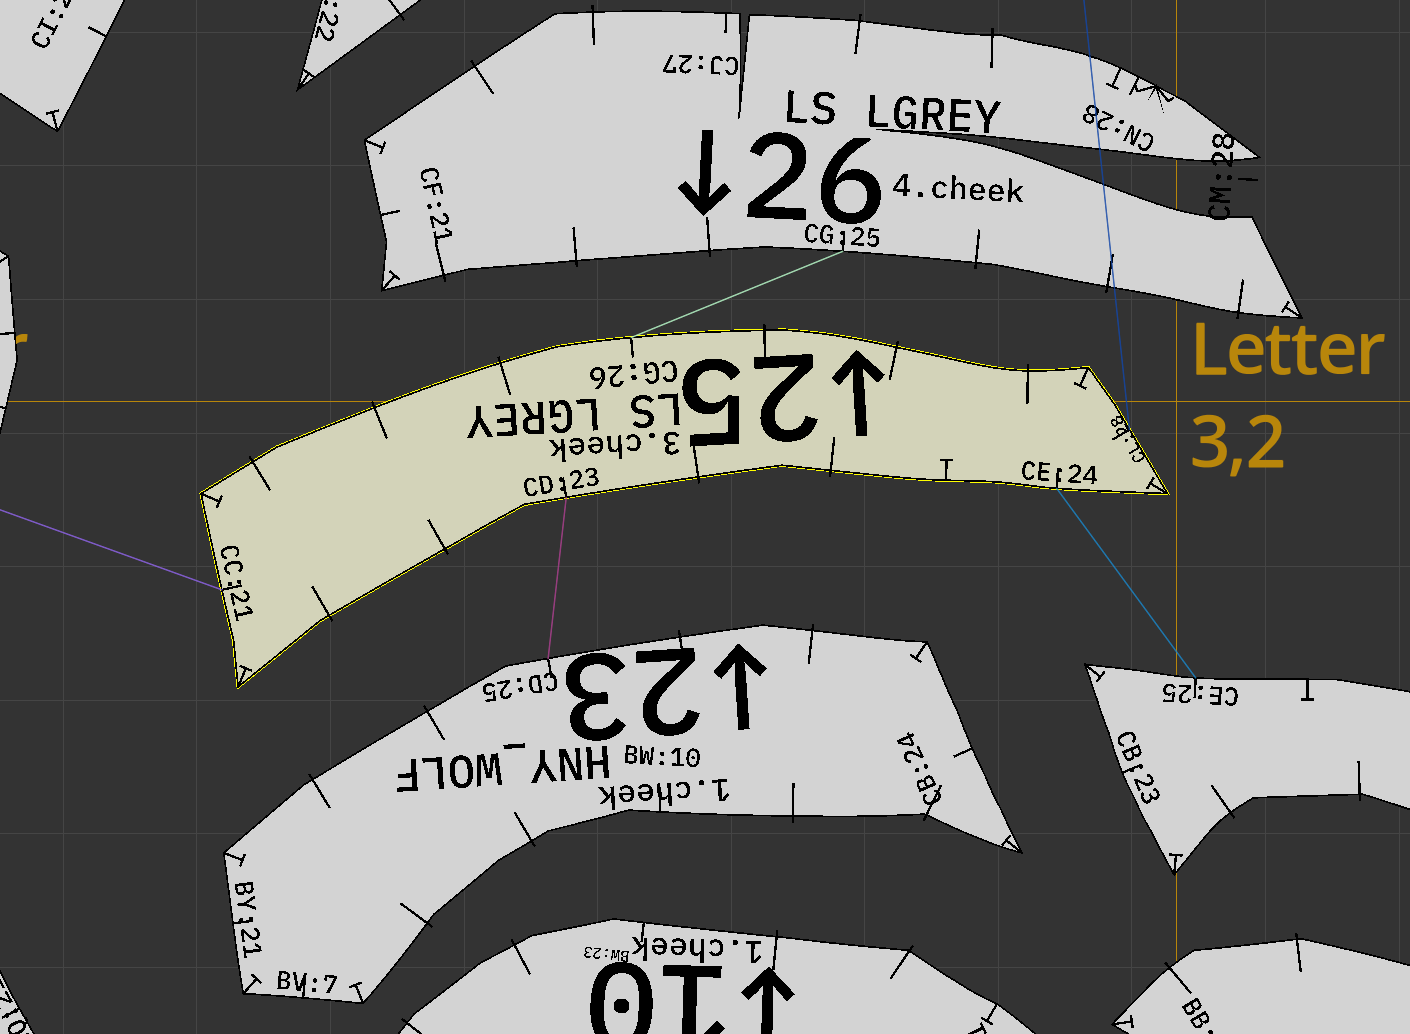
In the example above pattern 25 is selected, and the connections to other seams are indicated with different colored lines. The arrow next to 25 points in the direction of the grain-line. “LS_LGREY” is the material ID associated with the pattern, and “cheek” is the name assigned to the pattern.
Each associated seam is labeled, with a unique seam ID and the associated pattern ID.
All these labels are created automatically and laid out intelligently so it tend s to just work. The goal being efficiency - you shouldn’t have to do all this work when pandafold can do it for you.
The small lines on the pattern are alignment marks, with the L or T shaped marks indicating the end of a seam.
Output
When it comes time to create fabric patterns you can either print them or project them.
When you print them you can select different paper sizes (depending upon what your printer supports).
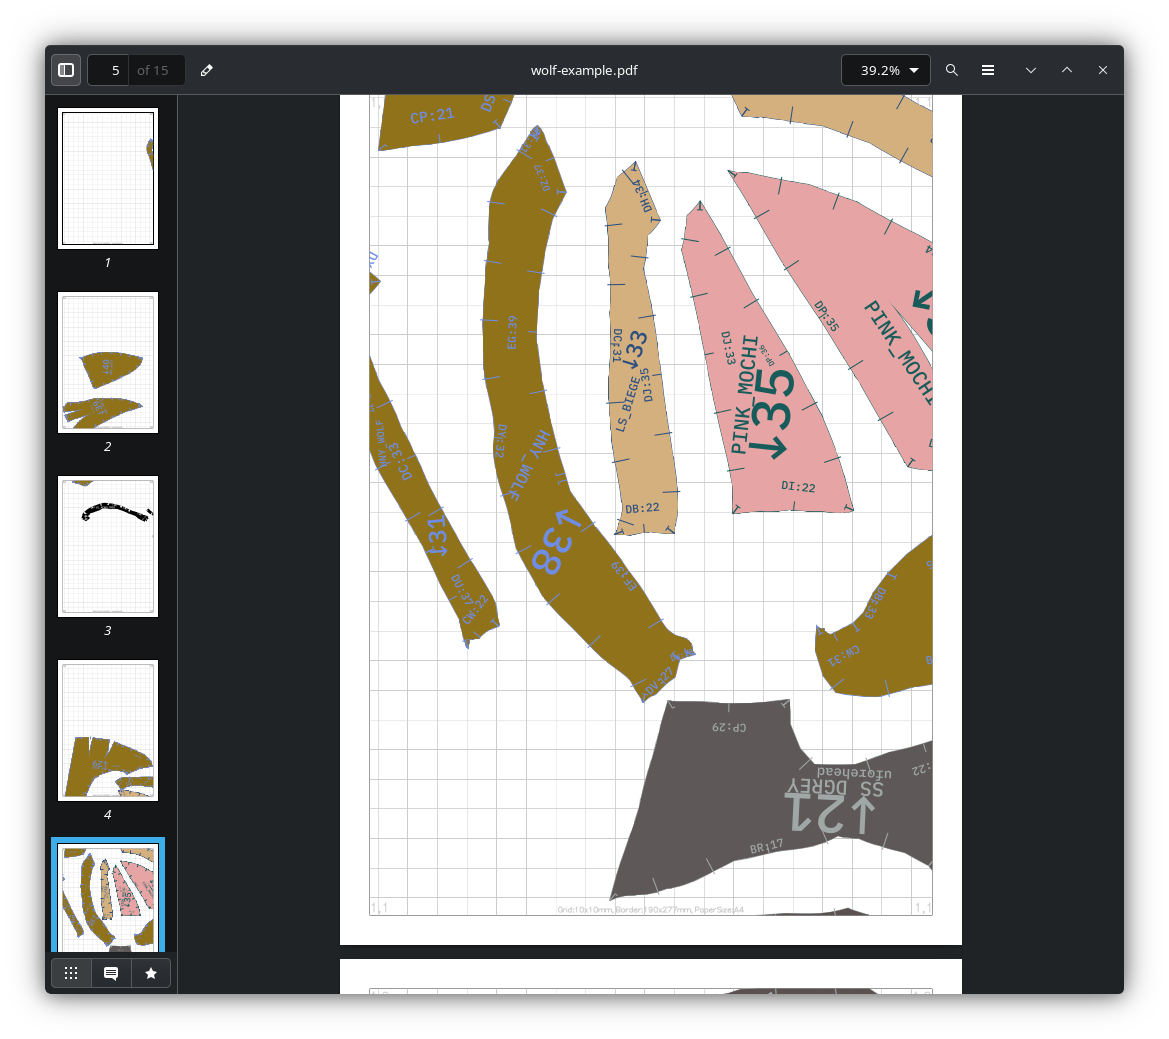
Here is the PDF that was created from this example.
There are cheap online places to print patterns on large paper cheaply, for example pdfplotting.com.
Or you can project them, using pandafolds in-built projector view, which is better for large projects, and also saves paper.
You can pick up cheap projectors off of Amazon for less than 60$ which have been tested with pandafold.
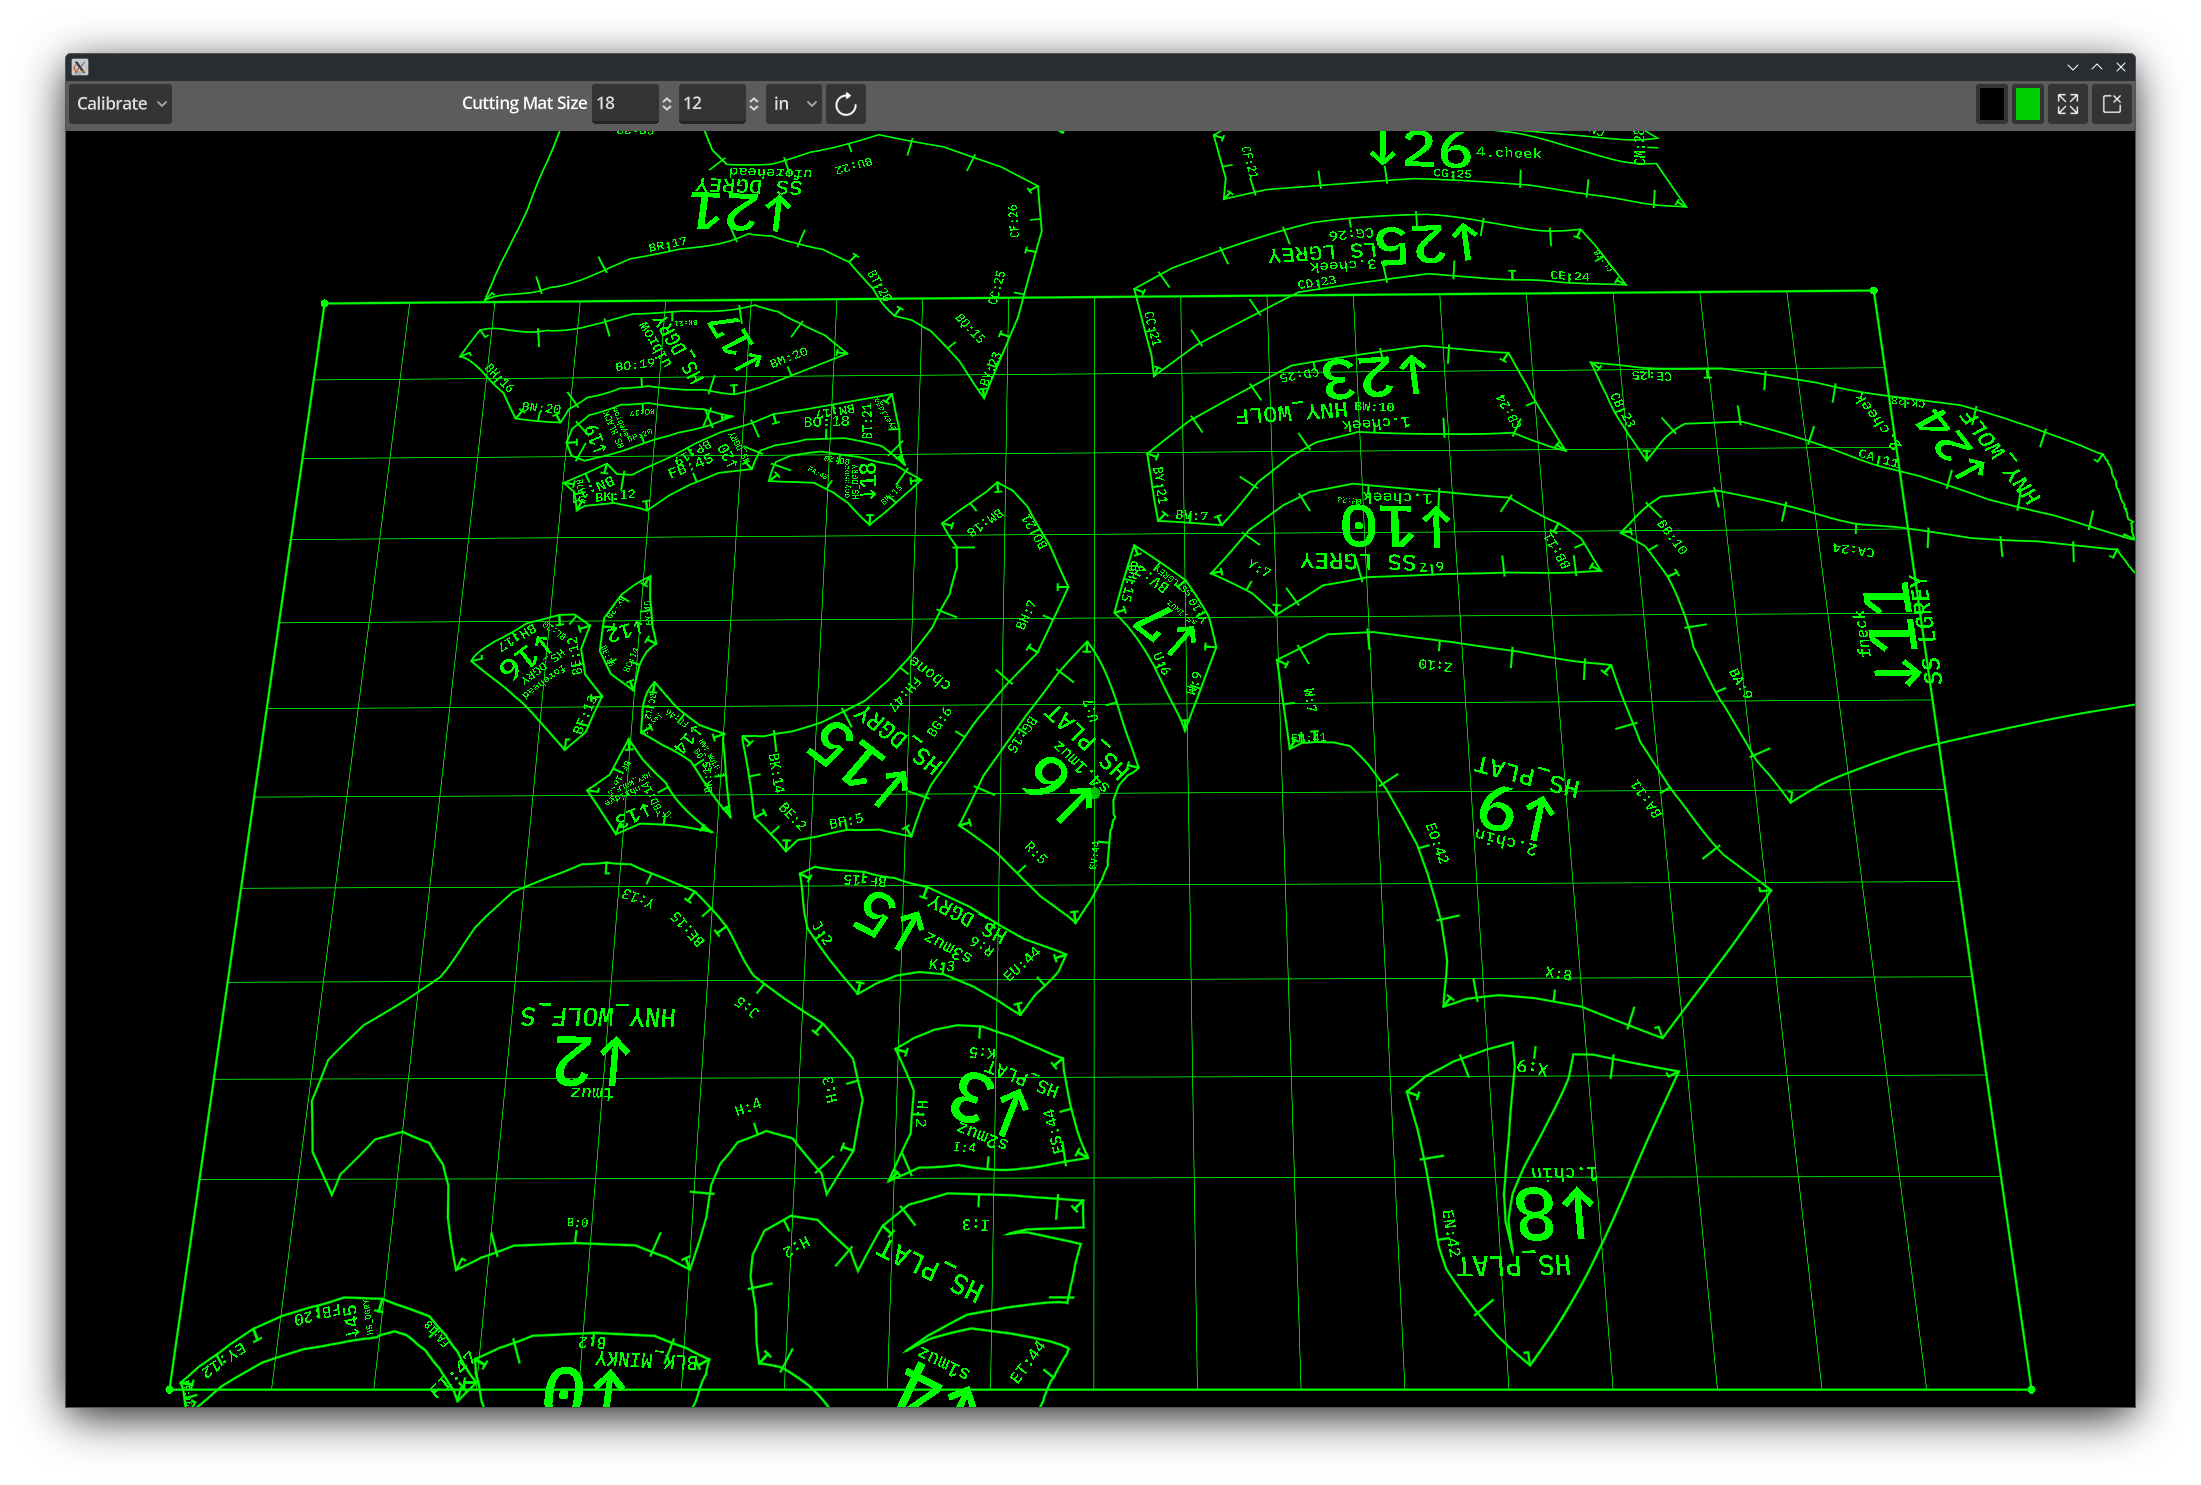
From this view you can calibrate your projector setup and then project the patterns.
Lastly you can export SVGs for laser cutting.